Step-by-Step Tips for Installing Your Backsplash

Installing your own backsplash can brighten up your kitchen or bathroom. It's a great way to add a personal touch to your home. Plus, doing it yourself can save you money and give you a sense of accomplishment.
In this guide, we'll walk you through the whole process of installing a backsplash. We'll start with gathering the right tools and materials. Then, we'll show you how to prepare the surface, install the tiles, and finish with grout and sealant. Each step is broken down into easy-to-follow instructions, so even if you're new to DIY projects, you'll be able to follow along.
Whether you're updating an old backsplash or adding a new one, this guide will help you get the job done right. So, let's get started and transform your space with a beautiful new backsplash!
Gathering the Right Tools and Materials
Essential Tools
Before you start, make sure you have all the essential tools. You will need a tape measure, level, tile cutter or wet saw, trowel, rubber float, bucket, sponge, and safety gear like gloves and goggles. These tools will help you cut the tiles to fit perfectly, apply adhesive, and grout the tiles after installation. Having everything ready from the start saves you from running back and forth to the store.
Tile Options
Choosing the right tiles is a big part of your project. There are many options like ceramic, porcelain, glass, and even metal tiles. Ceramic tiles are budget-friendly and come in many colors and styles. Porcelain tiles are a bit more durable and great for high-moisture areas. Glass tiles add shine and make small spaces look bigger. Metal tiles give a modern look but can be more expensive. Think about the style and function you want for your space when picking your tiles.
Adhesives and Grout
Next, you need to get the right adhesives and grout. Mastic is good for lightweight tiles and quicker installations, while thin-set mortar is stronger and better for heavier tiles or when tiling over difficult surfaces. For grout, you can choose between sanded and unsanded. Sanded grout is stronger and better for bigger gaps, while unsanded grout works well for small gaps and delicate tiles. Don't forget to get grout sealer to protect your work and keep it looking new.
Preparing the Surface
Cleaning and Measuring
Preparation is key to a successful backsplash installation. Start by cleaning the wall where you’ll install the backsplash. Remove dirt, grease, and old adhesive to ensure the new tiles stick well. Use a mixture of water and a mild detergent, then rinse and let the wall dry completely. Once the surface is clean, measure the area where the backsplash will go. Write down the height and width, so you know how many tiles you’ll need.
Marking Guidelines
Use a pencil and level to mark your guidelines. Draw a horizontal line at the bottom as a starting point, and then draw vertical lines to create a grid. This helps you install the tiles evenly. If your tiles have a specific pattern, take the time to plan how it will look on the wall. Dry fitting a few tiles on the counter can help you visualize your design before you start.
Applying Primer
Applying a primer to the wall helps the tiles stick better. Use a paint roller to apply an even layer of primer over the area where you’ll place the backsplash. The primer creates a better grip for the adhesive. Let the primer dry according to the manufacturer’s instructions. This step is essential for a long-lasting backsplash, especially in areas with high moisture like kitchens and bathrooms.
Installing the Backsplash
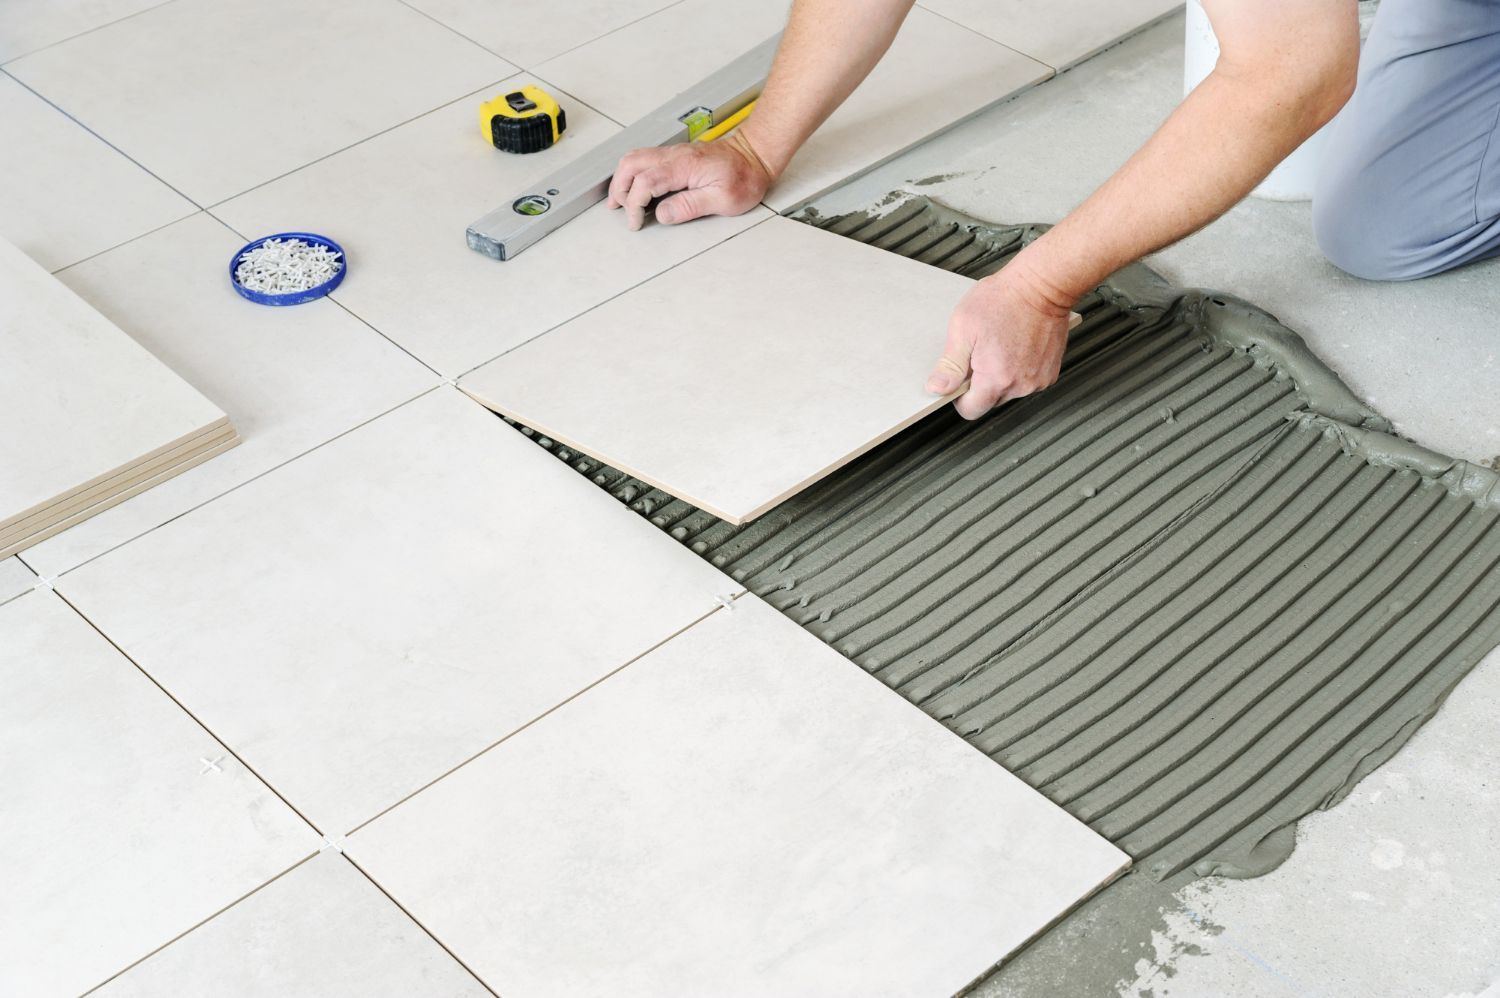
Mixing and Applying Adhesive
Start by mixing your adhesive according to the package instructions. Generally, it's best to use a thin-set mortar for strength and durability. Use a trowel to spread the adhesive evenly over a small section of your marked wall, starting at the bottom. Work in sections so the adhesive doesn't dry out before you place the tiles. Make sure to create ridges in the adhesive with the notched edge of your trowel to help the tiles stick better.
Placing the Tiles
Place your first tile at the bottom center of your grid, pressing it firmly into the adhesive. Continue placing tiles, following your guidelines. Use tile spacers to keep gaps even between each tile. This will help with uniform grouting later. Check with a level to make sure the tiles are straight. Adjust as needed before the adhesive sets. Complete each section before moving on to the next to keep your work area manageable.
Cutting and Fitting Custom Pieces
You will likely need to cut some tiles to fit around outlets, corners, or edges. Measure the space where a cut tile is needed and mark the tile accordingly. Use a tile cutter or wet saw to make precise cuts. Wear safety goggles and gloves while cutting tiles. Fit the cut tiles into place, ensuring they align well with surrounding tiles. Once all tiles are placed, let the adhesive dry as per the manufacturer’s instructions before moving on to the next step.
Finishing Touches
Applying Grout
After the adhesive has dried, it's time to apply grout. Mix the grout according to the instructions on the package. Use a rubber float to spread grout over the tiles, pressing it into the gaps between each tile. Make sure all gaps are filled thoroughly. Wipe off excess grout from the surface of the tiles with a damp sponge. Rinse the sponge often to avoid leaving grout residue on the tiles. Let the grout dry according to package directions.
Sealing the Tiles
Sealing the grout helps protect it from stains and moisture. Use a grout sealer that matches your grout type. Apply the sealer carefully over the grout lines with a small brush or applicator. Wipe off any excess sealer from the tiles before it dries. Let the sealer cure as per the product instructions. This step will make your backsplash more durable and easier to clean.
Cleaning and Polishing
Once the grout and sealer are dry, give your backsplash a final cleaning and polish. Use a soft cloth to buff the tiles and make them shine. Check for any leftover grout haze and clean it off with a tile cleaner if needed. Step back and admire your new backsplash! Regular cleaning with a gentle cleaner will keep it looking fresh and new.
Conclusion
Installing your own backsplash is a rewarding project that can transform your kitchen or bathroom. By following these steps—gathering the right tools, preparing the surface, installing the tiles, and adding the finishing touches—you can achieve a professional-looking result. Taking the time to plan and execute each step carefully ensures a beautiful and long-lasting backsplash.
Feeling inspired to start your own backsplash project? Head over to Wilson’s Custom Flooring, an
Owensboro floor store, for expert advice and a wide selection of materials to choose from. Our team is here to help you make your vision come to life. Contact us today and let’s get started on creating your dream space!