Installing Wall Accents: A Quick and Easy Guide

Are you looking to refresh your home's interior without a major renovation? Installing wall accents is a simple yet impactful way to add character and style to any room. Wall accents can transform a plain wall into a focal point, adding texture, color, and depth. Whether you prefer rustic wood panels, sleek metal designs, or vibrant wallpapers, there's a wall accent out there that will suit your taste and enhance your space.
Choosing the right wall accent involves more than just picking something that looks nice. You need to consider the room’s existing décor, the mood you want to create, and the ease of installation. Wall accents can range from easy peel-and-stick options to more permanent fixtures requiring tools and some DIY skills. But don't worry; even if you're not a seasoned handyman, many wall accent projects are straightforward and can be completed on a weekend.
In this article, we'll walk you through everything you need to know to install wall accents in your home successfully. From selecting the perfect design to gathering your tools and materials, and finally, the step-by-step installation process, we've got you covered. With a little effort and the right guidance, your walls can go from drab to fab in no time.
Choosing the Right Wall Accent
Choosing the right wall accent involves considering various factors to ensure the end result blends well with your room's style and personal taste. First, consider the room's purpose. For instance, a living room might benefit from a warm, inviting accent like wood panels or elegant wainscoting. On the other hand, a modern kitchen may look great with sleek metal or geometric tile accents.
Next, consider the colors and textures already present in the room. Complementary colors and textures can enhance the overall look. For example, if your room has many neutral tones, a bold wallpaper can add a pop of color and become the room’s focal point. Conversely, a more subtle wall accent, like shiplap or beadboard, can provide a nice balance in a colorful room.
Finally, pay attention to the ease of installation and maintenance. Some wall accents, like peel-and-stick tiles or wallpapers, are perfect for a quick and easy update. Others, like wooden planks or stone veneers, might require more effort and tools but offer a more permanent solution. By considering these factors, you can choose a wall accent that enhances your space and fits your lifestyle and DIY skills.
Tools and Materials You’ll Need
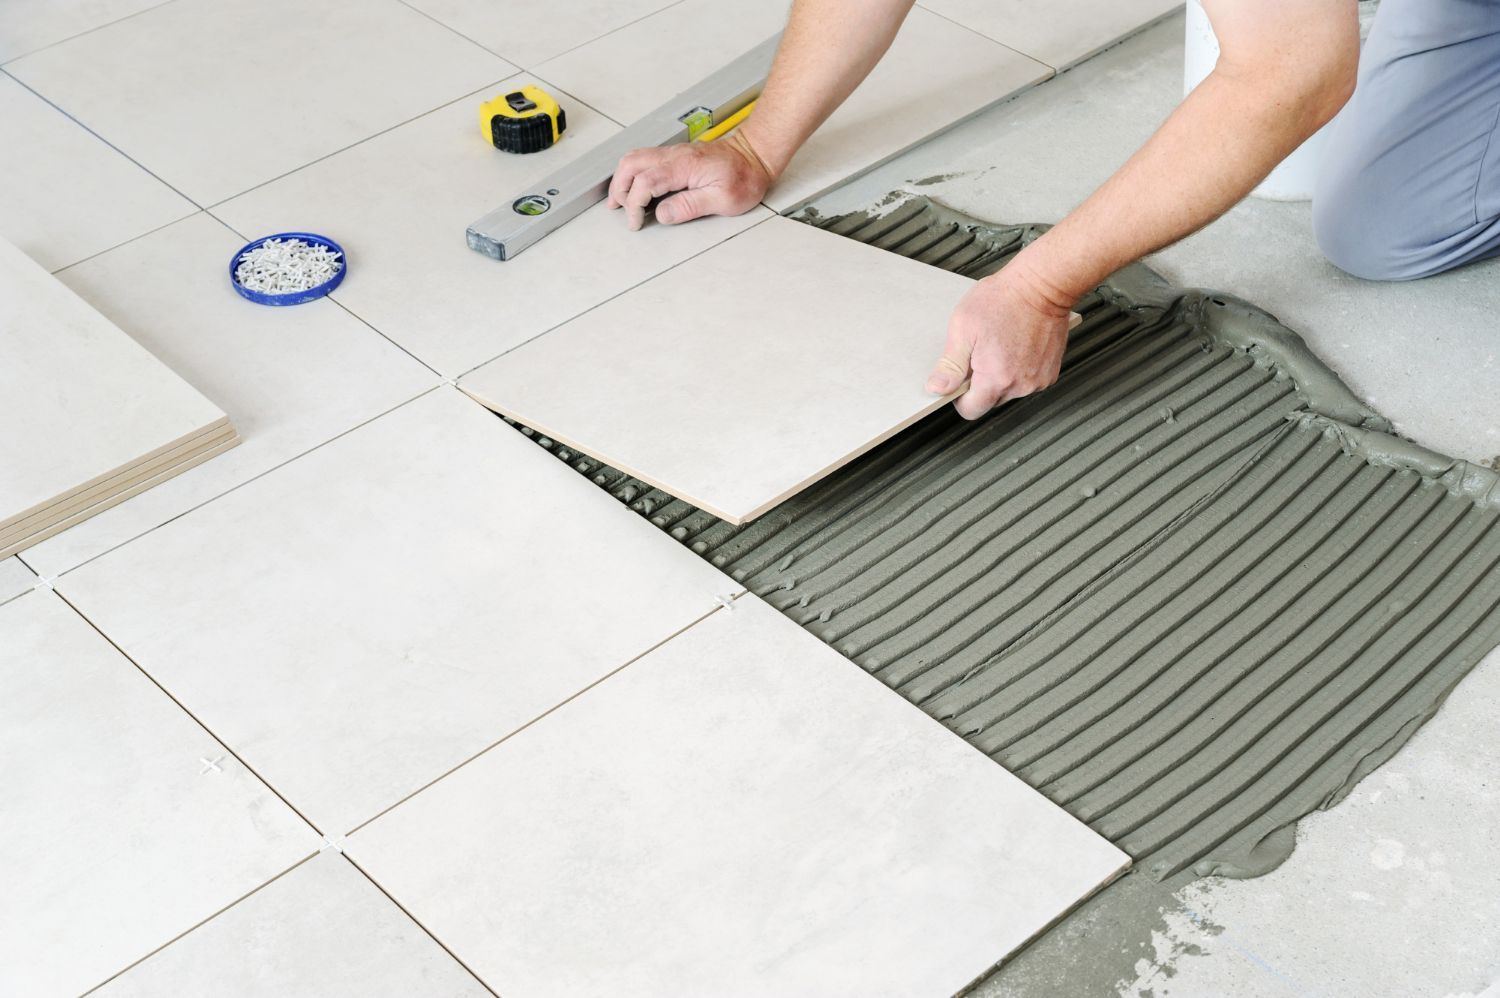
Before diving into your wall accent project, gather all the necessary tools and materials. This step saves you time and frustration. Here’s a basic list of common items you might need:
1. Measuring Tape - Essential for getting precise dimensions of your wall and materials.
2. Level - Ensures your wall accent is straight and even.
3. Utility Knife or Scissors - Useful for cutting peel-and-stick tiles or wallpapers.
4. Adhesive - Depending on the type of wall accent, you may need a strong adhesive like construction glue.
5. Nails and Screws - For securing heavier accents like wood planks or metal panels to the wall.
6. Hammer or Drill - Needed for attaching wall accents with nails or screws.
7. Spacers - Handy for tile installations to keep spaces consistent.
8. Paint and Brushes - If you plan to paint your accent, ensure you have the right type and color of paint.
9. Sandpaper - Useful for smoothing rough edges or surfaces before installation.
Of course, the specific tools and materials will vary depending on the type of wall accent you choose. Always check the manufacturer’s instructions for any additional items you might need. Having everything ready before you start makes the installation process smoother and more enjoyable, allowing you to focus on creating a beautiful accent wall.
Step-by-Step Installation Process
Installing wall accents can seem daunting, but breaking it down into simple steps makes it manageable. Here's how to do it:
1. Measure Your Wall: Start by measuring your wall to determine how much material you will need. Write down the measurements to guide your purchases.
2. Prepare the Wall: Clean the wall thoroughly to remove dust and grime. If you're installing a heavy material, like wood or metal, ensure it is dry and free of moisture.
3. Plan Your Layout:
Arrange your wall accent pieces on the floor to see how they will look. This helps you visualize the final result and make any adjustments before you start.
4. Mark Your Guidelines: Use a level to draw light pencil lines on the wall. These lines will guide you and keep your installation straight.
5. Cut Your Materials:
If necessary, cut your materials to fit the wall. Use a utility knife for peel-and-stick options or a saw for wood or metal panels.
6. Apply Adhesive:
For materials needing glue, apply a thin layer of adhesive according to the manufacturer's instructions. If you are using self-adhesive materials, skip this step.
7. Start Installing:
Begin at the bottom corner and press your first piece into place. Continue placing pieces, following your guidelines, and making sure they are snug and level.
8. Secure Heavier Pieces: For heavier accents like wood or metal, use nails or screws to ensure they stay in place. Make sure to hit wall studs for better support.
9. Finishing Touches:
Check for any gaps or uneven edges and adjust as needed. Touch up any areas with paint or caulk to give it a neat finish.
By following these steps, you can confidently install wall accents and transform your room into a stylish space.
Maintaining and Refreshing Your Wall Accents
Once you’ve installed your wall accents, keeping them looking new involves regular maintenance and occasional refreshing. Here are some easy ways to care for different types of wall accents:
1. Dust and Clean Regularly:
Use a soft cloth or duster to clean your wall accents. For materials like wood or metal, a damp cloth can help remove stubborn dust. Avoid harsh chemicals that can damage the surface.
2. Repair Minor Damage:
If you notice any scratches or dents, address them quickly. For minor scratches on wood, a wood marker or filler can do wonders. For metal, touch-up paint can help cover any nicks.
3. Refresh the Finish:
Over time, your wall accents may lose their luster. For wood, consider applying a fresh coat of varnish or paint. Metal accents can benefit from a polish to restore their shine.
4. Reapply Adhesives:
If any peel-and-stick tiles or wallpapers start to peel, use a suitable adhesive to reapply and secure them in place.
5. Seasonal Check-ups: Review your wall accents every few months for any signs of wear or damage. This helps you catch and fix problems early before they become bigger issues.
By maintaining and refreshing your wall accents, you ensure they remain a stunning feature in your home for years to come.
Final Thoughts
Installing wall accents is an easy and rewarding way to update any room in your home. From choosing the right material to the actual installation and maintenance, each step is crucial in creating a wall that stands out. Following these easy tips, you can confidently take on your wall accent project and enjoy the transformation it brings to your space.
Wilson’s Custom Flooring is here to help with all your home improvement needs, from flooring to
wall accents. Ready to start your next project? Contact Wilson’s Custom Flooring today, and let's turn your design dreams into reality!